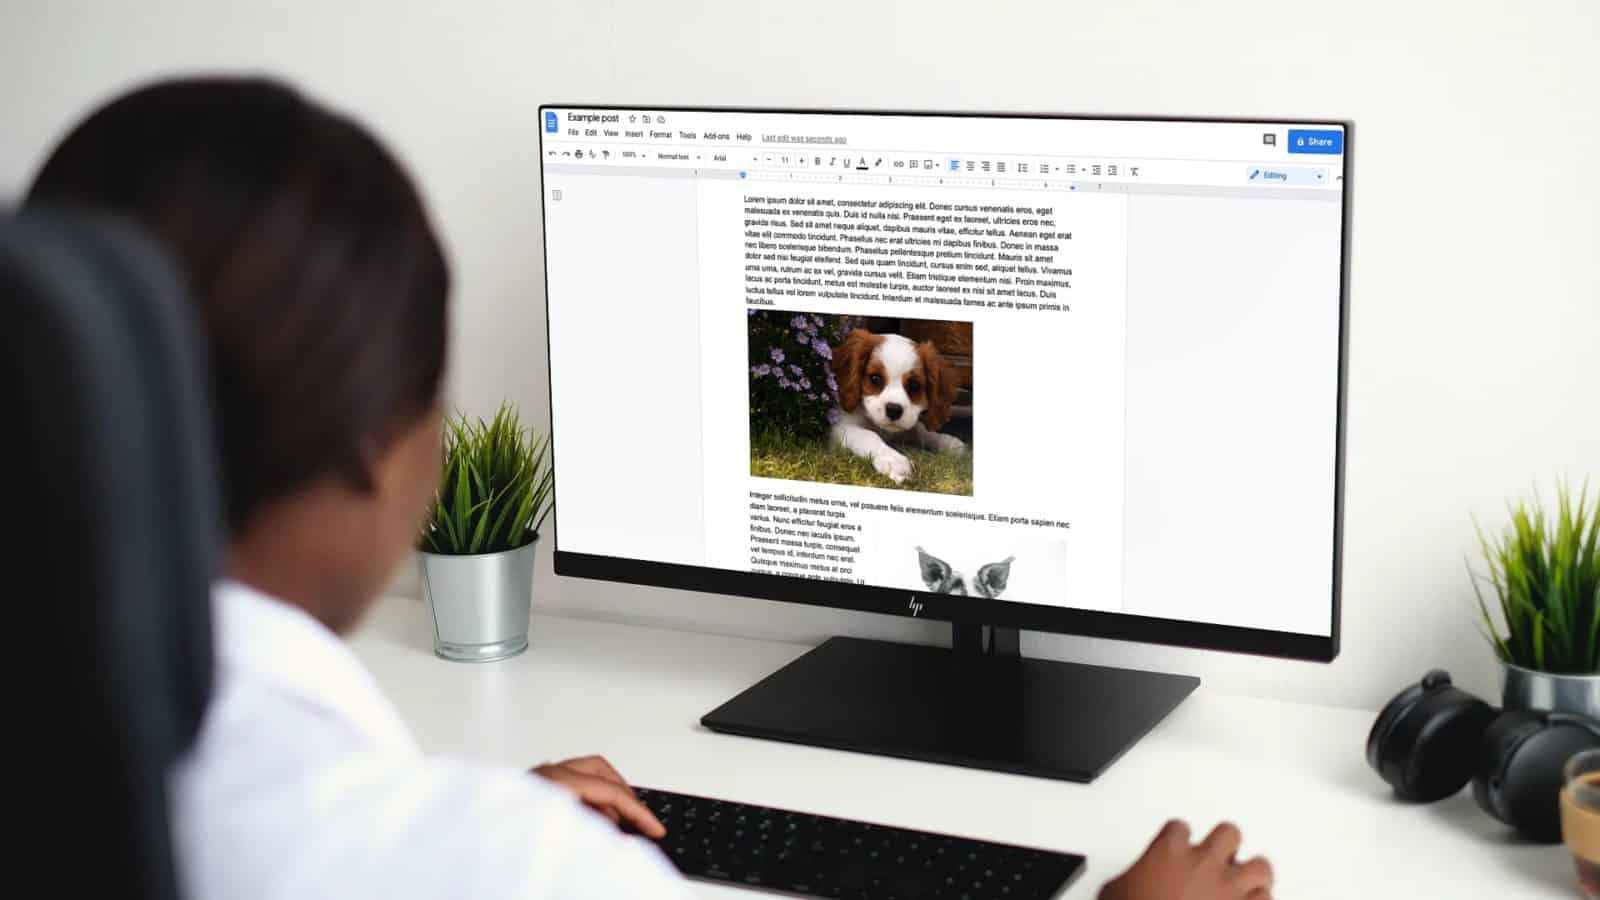

Downloading an image from a Google Doc can be a pain. If you want the highest quality image don’t take a screenshot. Either use the export to HTML option or Google Keep to get images saved to your computer.
Downloading all images can be helpful if you are trying to upload a blog post from a Gdoc or move it to another format.
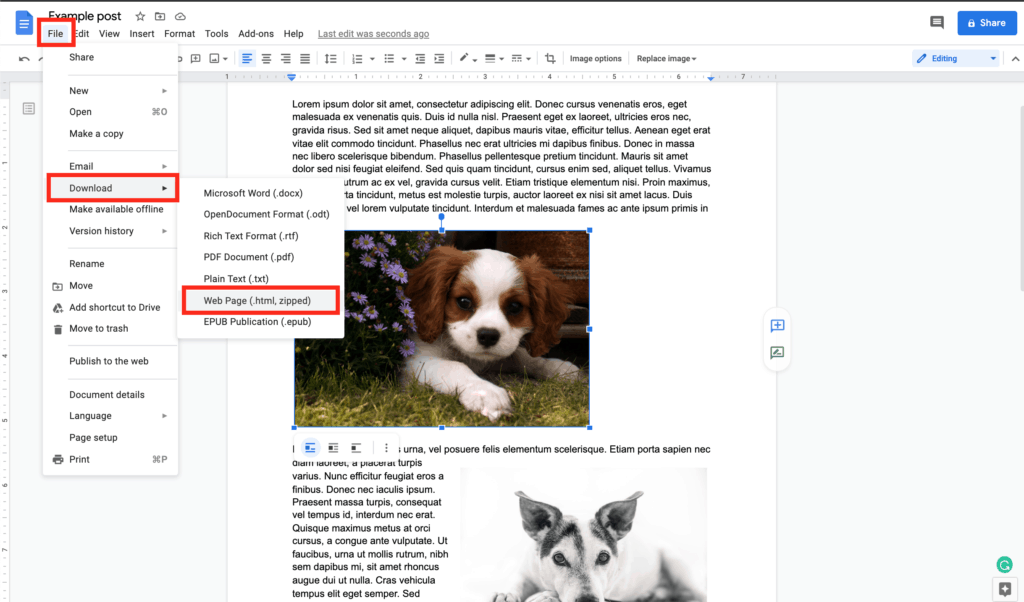
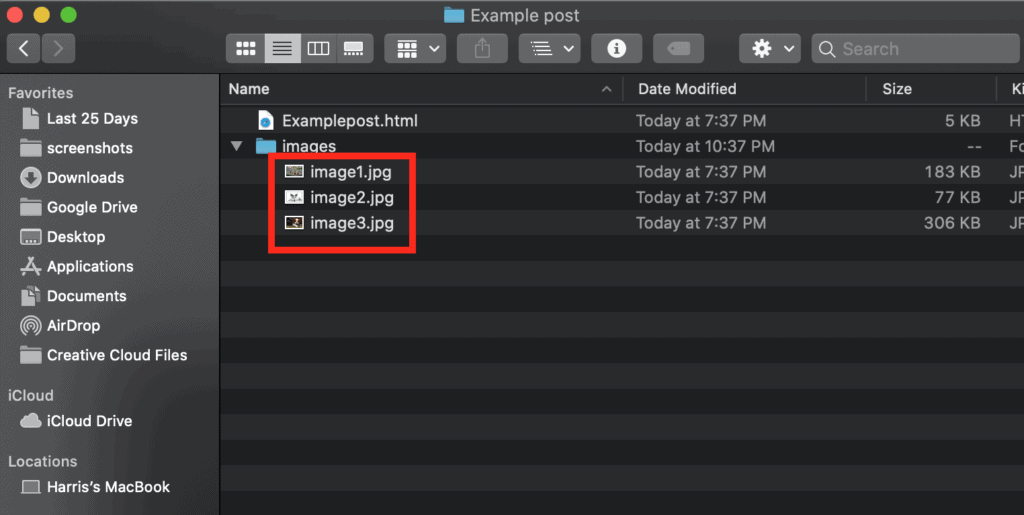
To easily download all the files just go to the menu file > download > web page (html zipped). That will download all the files as a zip folder. Once you unzip you will find all the images in the “image” folder numbered in the order they appear in your doc.
Here are the step-by-step instructions:
1. Go to the menu file > download > and click on the option “web page (html) zipped”
2. Find the downloaded file and double click to unzip the file
3. Open the top-level folder (named the Gdoc title) to find the image folder 4. Open the image folder and find the all images inside (in original .jpg or .png format)
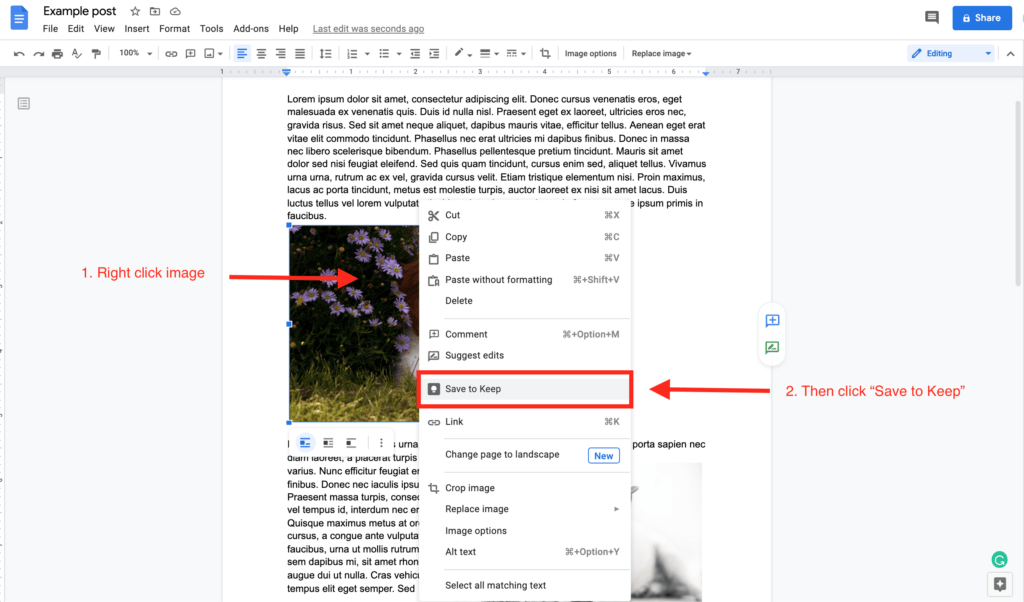
If you only need to download one image you can use the Google Keep feature to quickly save. To do this:
1. Right-click the image you want to save and then click “Save to Keep”
2. Right-click the image again in the right pane and then click “Save Image As…”
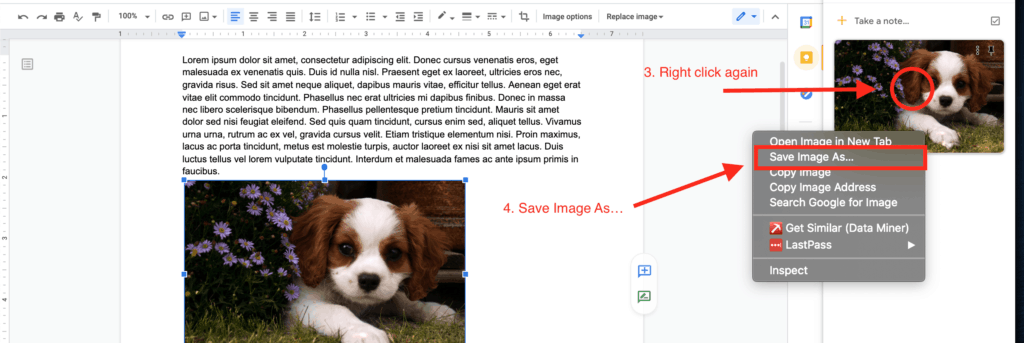
3. Open the downloads folder to find the image on your laptop.
If you have any questions feel free to drop them in the comments below. If you are looking for other helpful tips check out our article on the different types of logo file formats that you should be using.