

I just got a new Apple MacBook Air which reminded me how many customizations I rely on for my workflow. I’ve added my favorite tips and tricks below. Drop any additional tips in the comments at the bottom.
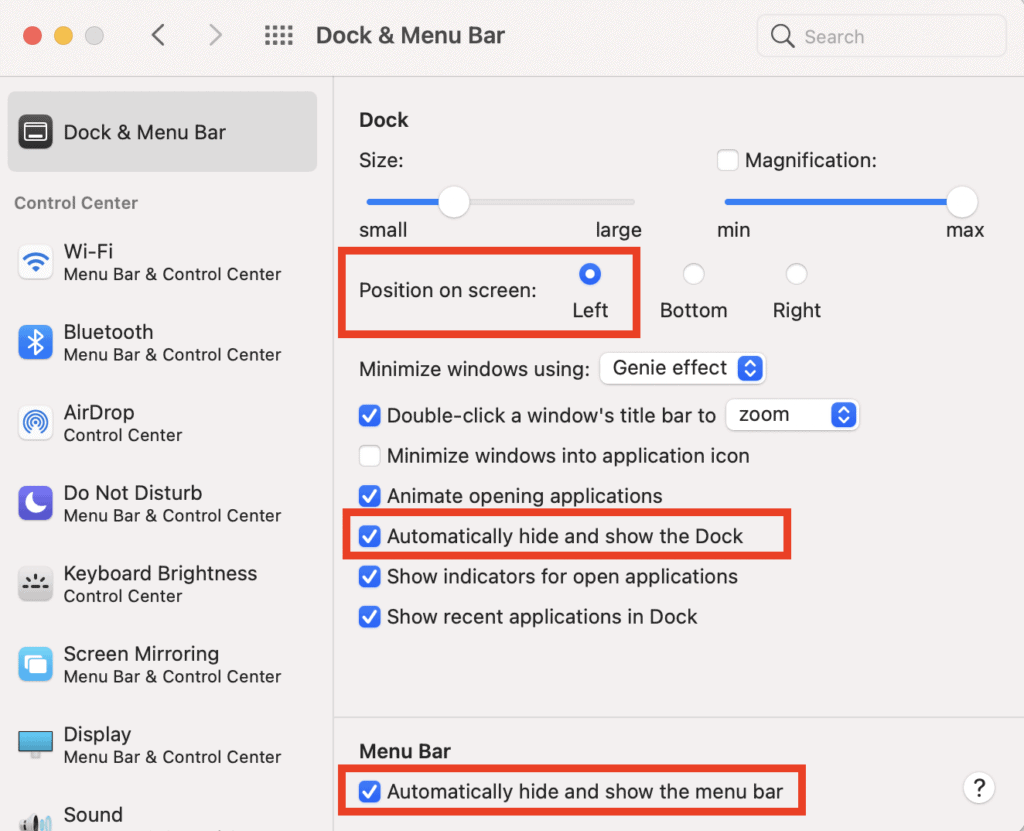
I prefer the Doc to sit on the left side of the computer and use the “automatically hide and show Doc” option. You can also hide the Menu Bar at the top but I’m impartial as it saves only about 25px.
By default screenshots get saved to your desktop which makes zero sense. You can easily set them up to go to their own screenshots folder by first taking a screenshot (command + shift + 5). Then select option > other location. From here you can create a new screenshots folder.
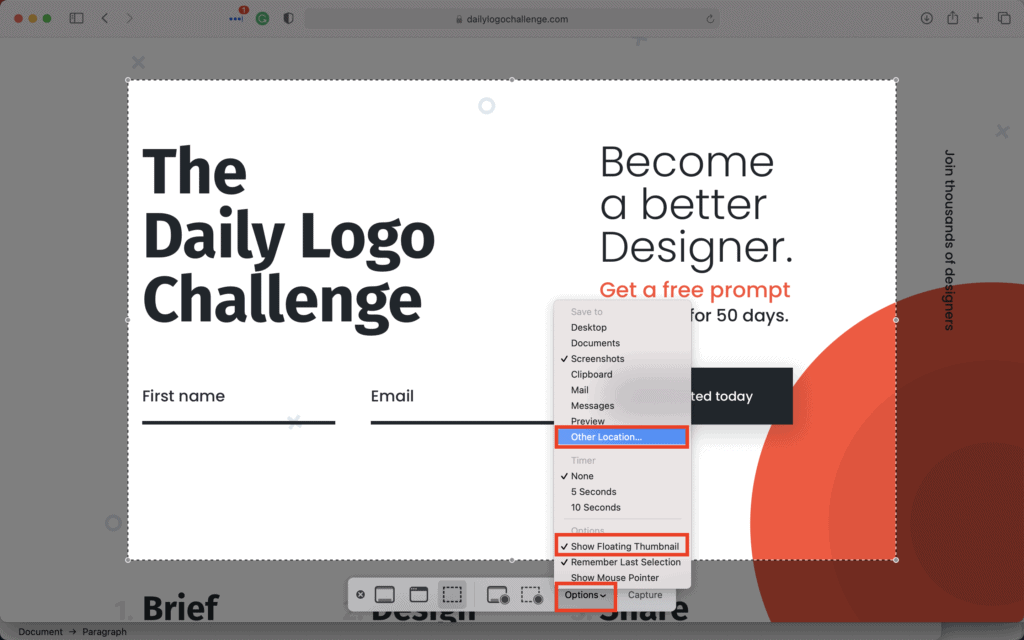
I also like to remove the “show floating thumbnail” from the bottom right corner after taking a screenshot.
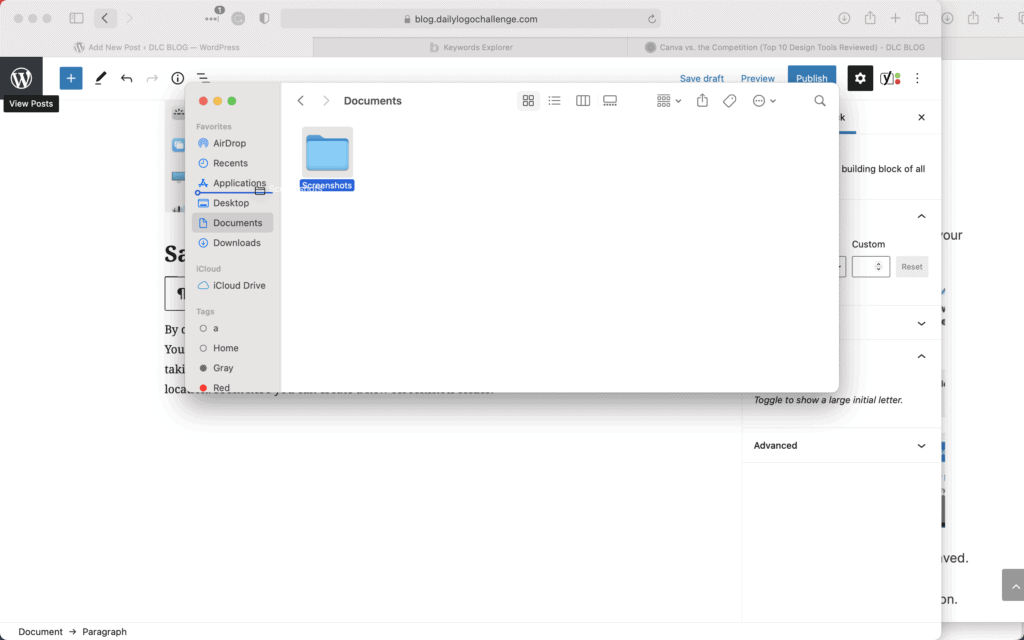
Second, you can easily access the new screenshots folder by saving it to the favorites on the finder window. Just find the folder and drag to the left “favorites” section.
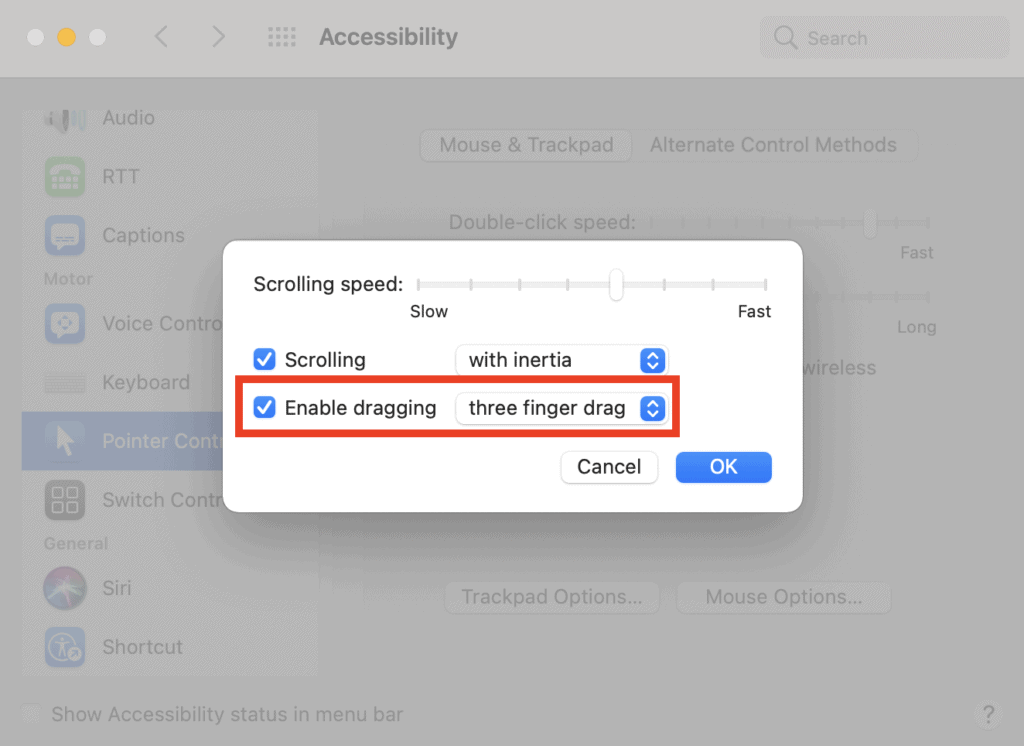
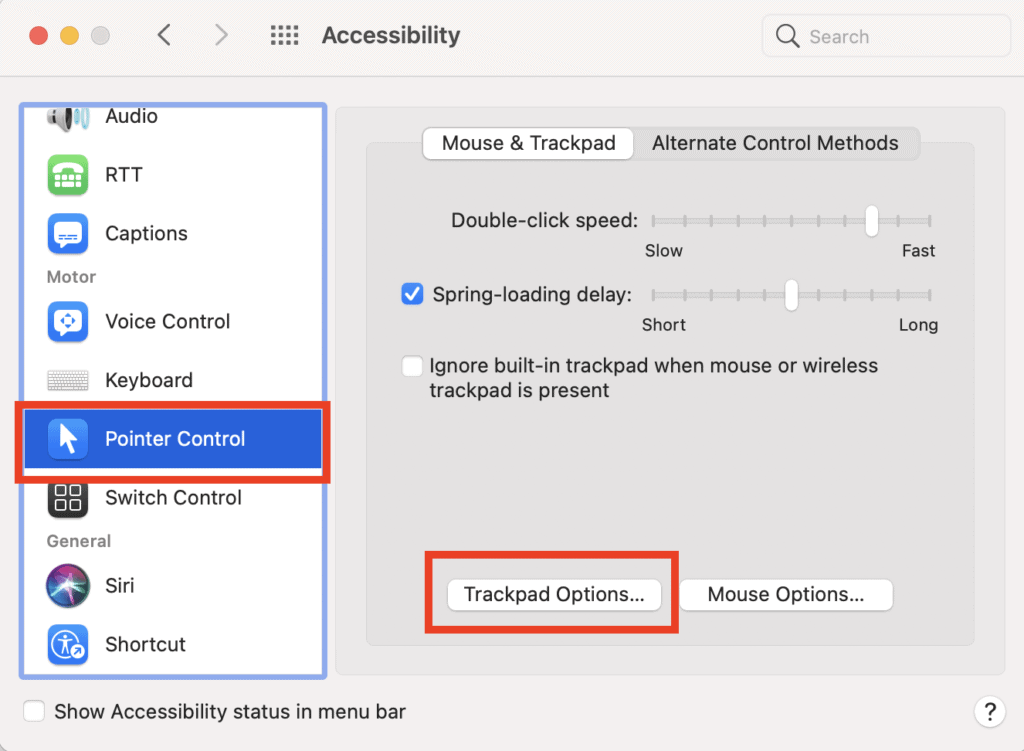
Most gestures live under system preferences > trackpad. Being able to drag windows around with three fingers is hidden under accessibility settings. From there click “trackpad options” and then “enable dragging” and select “three finger drag”.
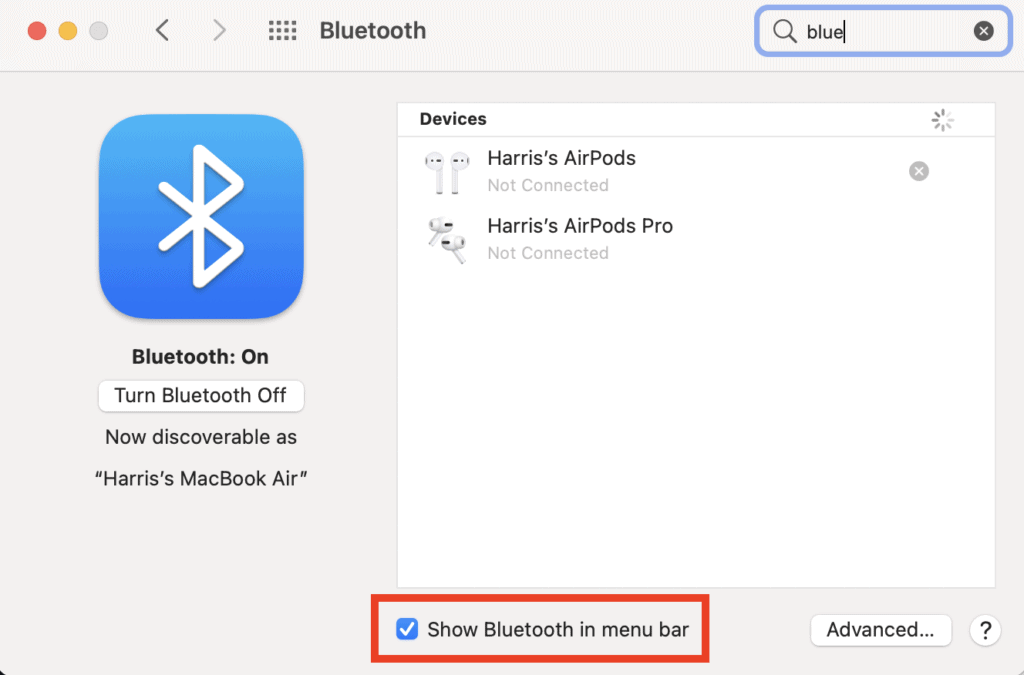
By default, the Bluetooth settings are hidden from the menu bar. To turn it on just go to the Bluetooth settings and check “Show Bluetooth in menu bar”. This is helpful if you have earbuds that you often connect.
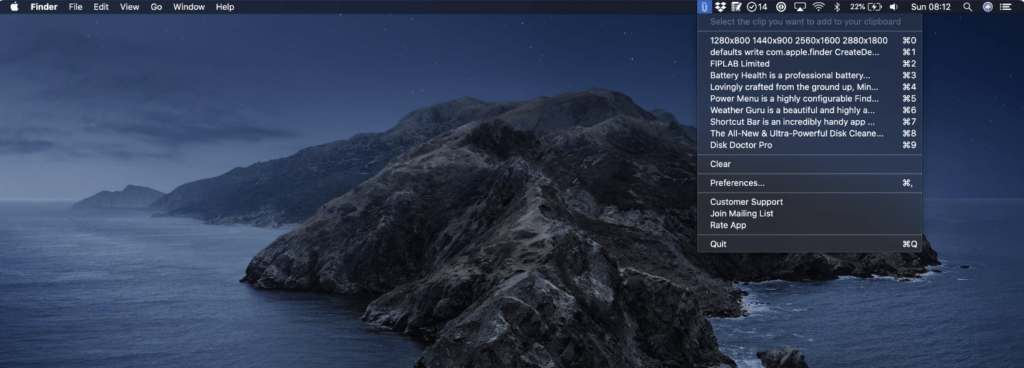
This is one of my favorite extensions. CopyClip creates a history of your copy selections. It’s a free app though they offer a paid version called CopyClip 2 for $7.99.

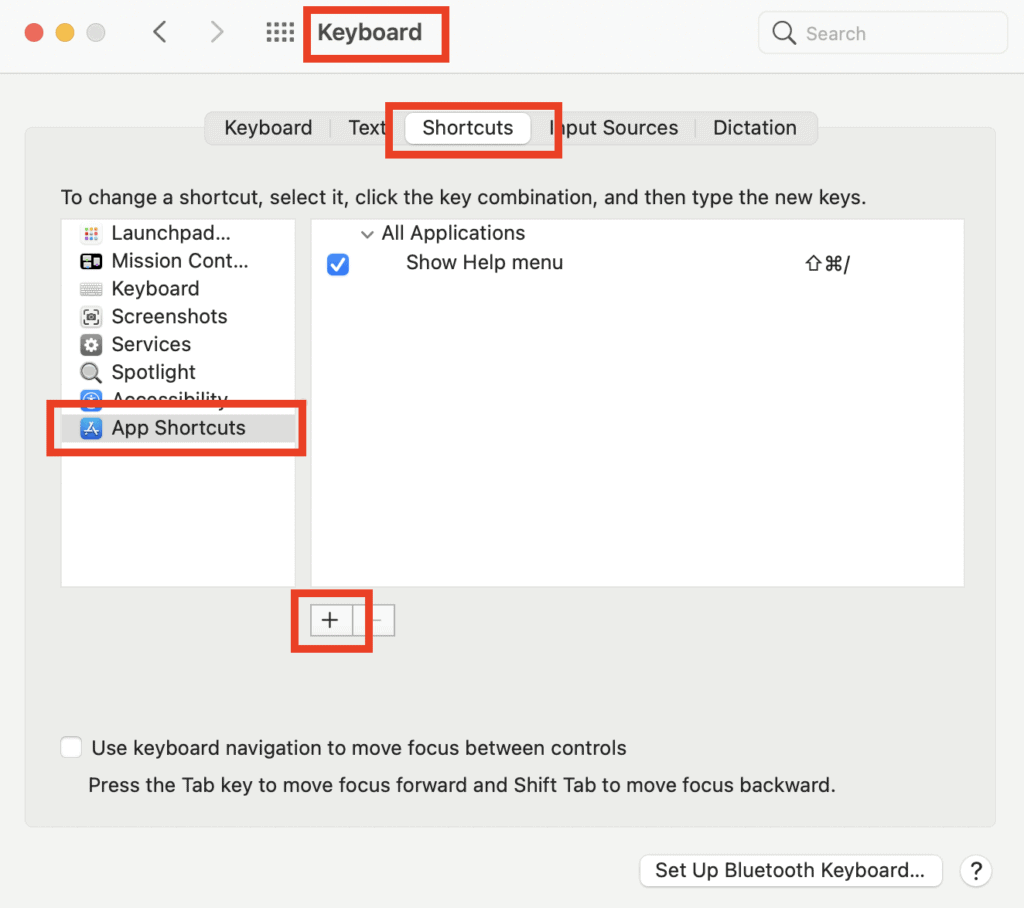
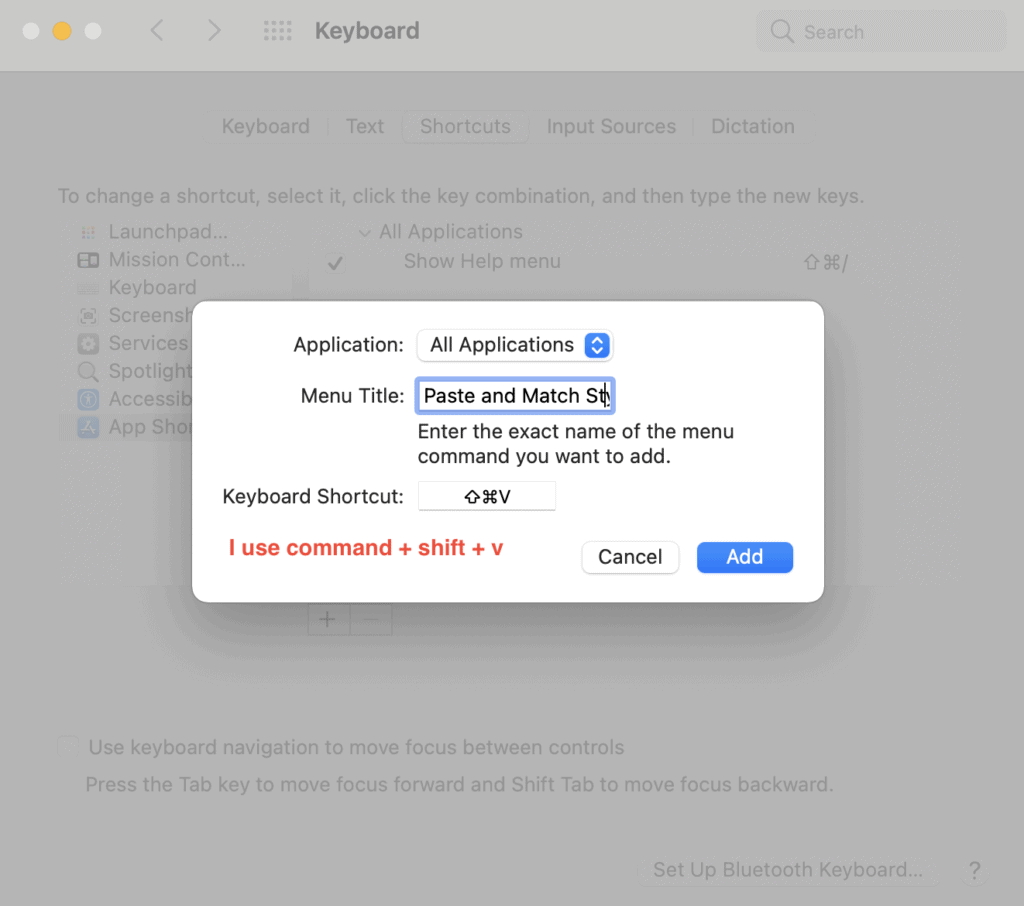
With some customization, you can make “command + shift + v” allow you to paste and match the style of the app/document you are pasting to. This means you can copy/paste text to an email like Gmail without having to reformat everything. First go system preferences > keyboard > shortcuts > app shortcuts > click + button > enter “Paste and Match Style”. For this tutorial make sure you use exactly “Paste and Match Style” as the command.
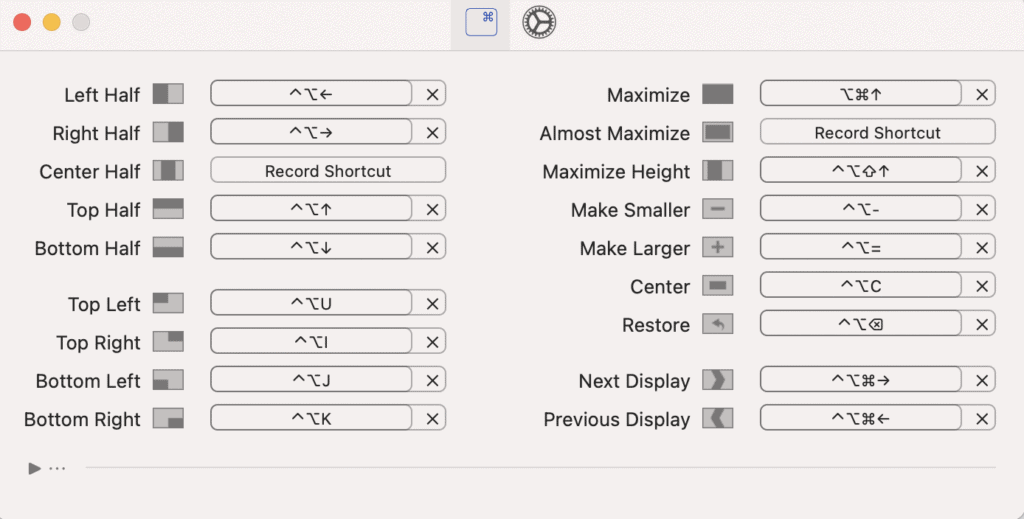
Rectangle allows you to add hotkeys to snap windows to the right, left, fullscreen, etc. It’s a free (open source) and supports both Apple Silicon and Intel Macs.
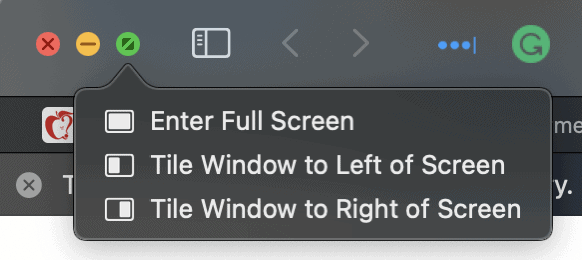
Or you can hover over the green fullscreen button in the top left of any window. After a second you will get three options to enter full screen or tile right or left.
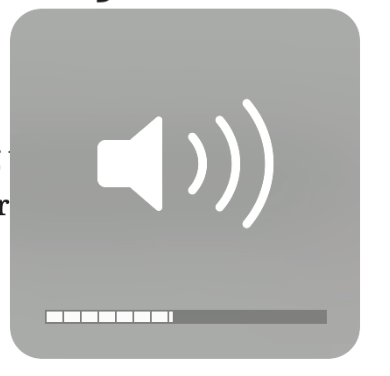
You can hold down “shift + option” while changing the volume using the F11 / F12 keys. This will allow the volume to make micro-adjustments less than a full bar. Helpful for things like a conference call.
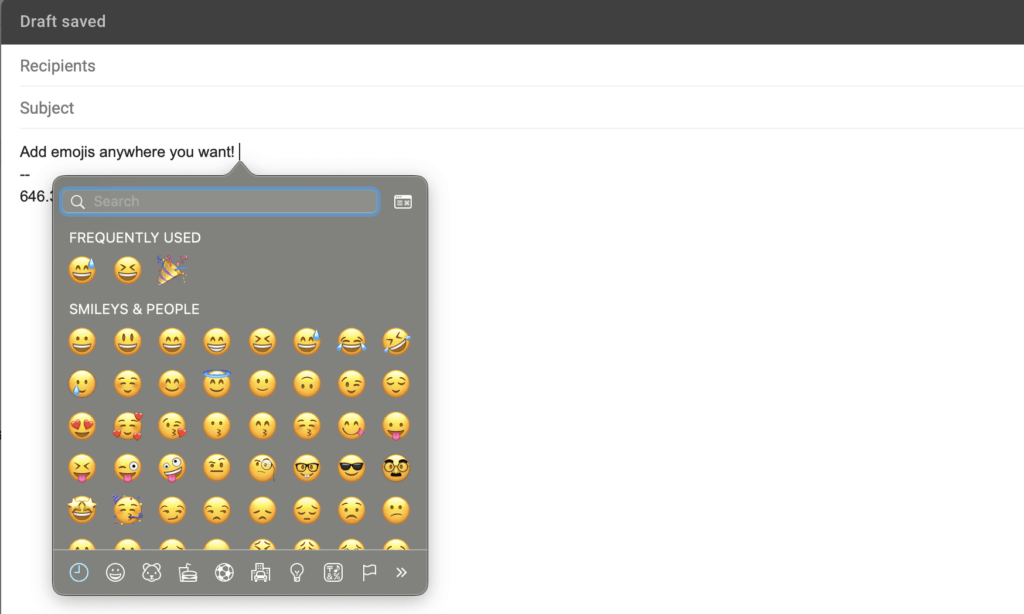
You can type “Control + Command + Space” and the emoji selector will pop up. An easy way to add emojis anywhere you type!
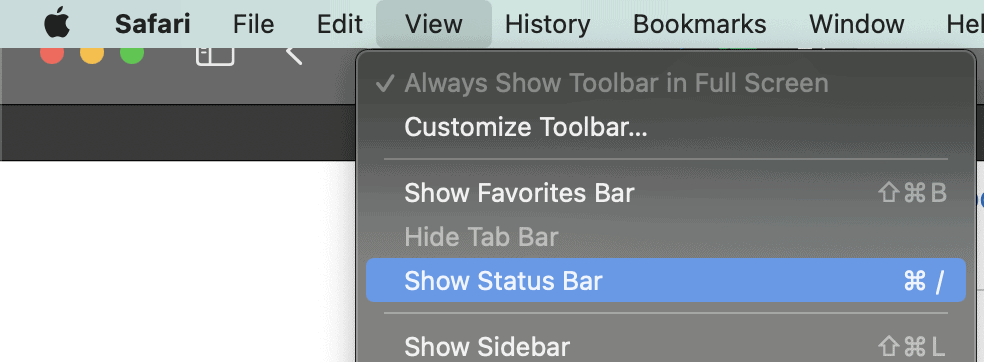
One of my favorite default settings of Chrome just requires two clicks to turn on. Just go to “view” > “show status bar”.
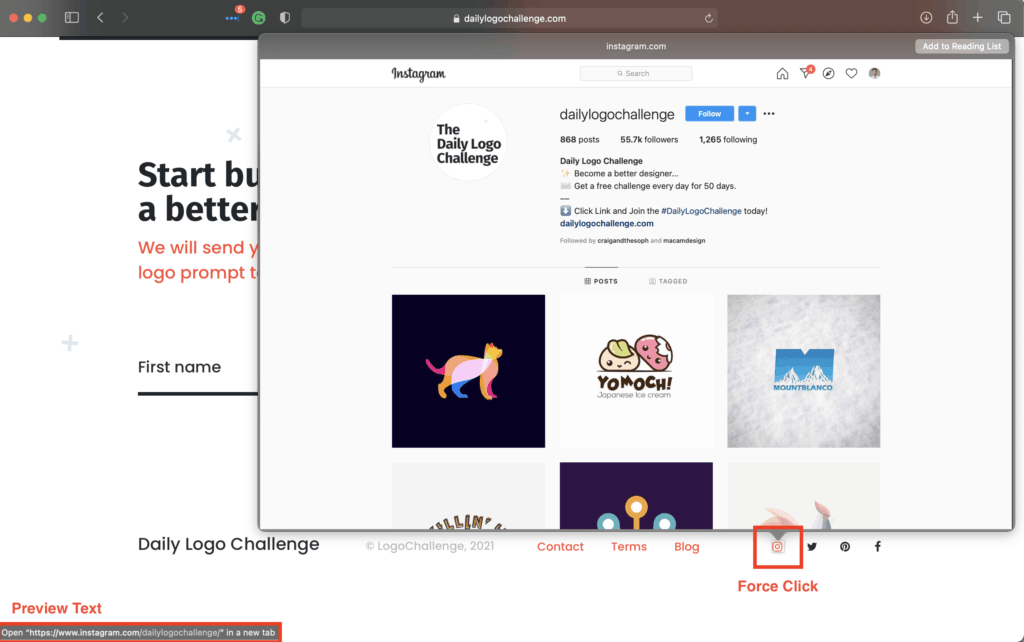
Related, you can force touch in Safari on a link to get a full image preview of the url in addition to the preview text in the bottom left of the screen. There are a number of other actions you can take with force touch. Feel free to try it out here with this link to our homepage (Daily Logo Challenge).
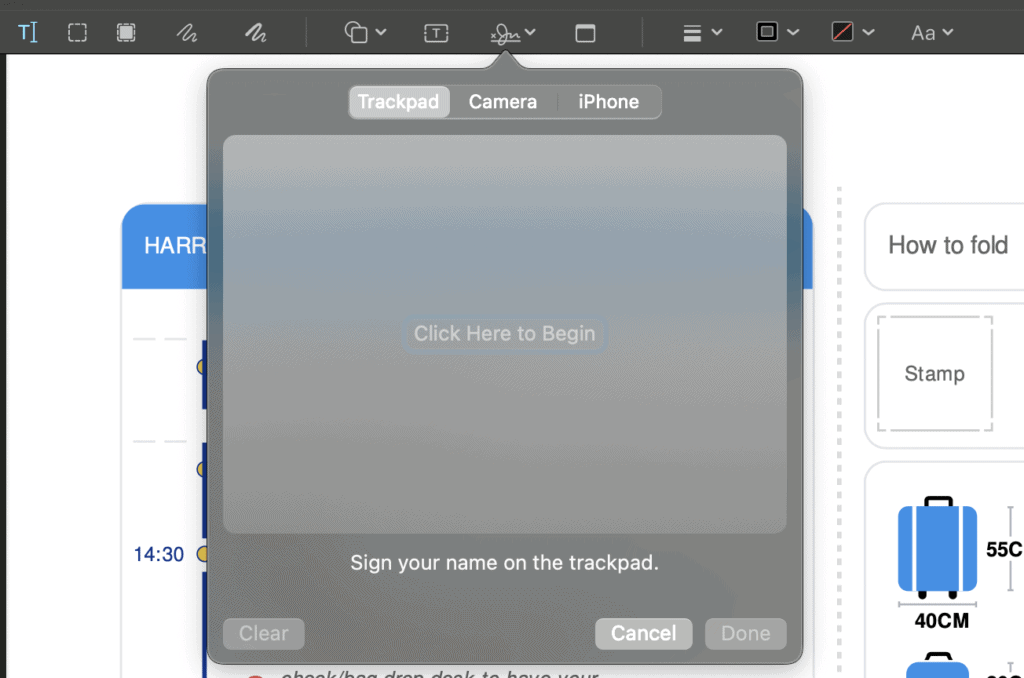
If you ever need to sign a PDF just open it in preview and then click the signature button. From there you will need to save a signature. You can use either the trackpad, iPhone, or camera. I find the camera gives the best quality scan. Just write your signature on a piece of paper and hold it up to the camera. It will be saved for future uses.
Maybe everyone knows this but I find setting the Finder view to “list” and then clicking on the date to sort from most recent is the most useful view for most tasks.

Other tips?
Drop any other tips you have in the comments below. Looking for tips for pros and folks just learning how to use a mac.